Picture searching for a common product like a television—friends give you opinions in a group chat, AI chatbots offer product comparisons, you Google the nearest stores on your phone, and you read a review on a blog.
Every purchase has become a journey, and the steps from A to Z are only growing. And, if you’re reading this article, it’s probably your job to track how people move through multiple channels and mine valuable insights for building your brand.
But keeping track of the user behavior of thousands of people can begin to seem overwhelming with tools, facts, charts, and privacy regulations.
Thankfully, you’re not alone. The same technology that has complicated the buyer’s journey can also help to track and process this info—if you learn how to find the right insights from the data.
In this blog, we’ll take a journey of our own to unpack the mysteries of content marketing analytics and focus on the tools and metrics that are most important to the success of your brand.
Did You Know? Over 600 million blogs exist worldwide and 7.5 million posts go live every day. In a world of AI automation, a strong analytics strategy ensures your content stands out and reaches the right readers.
Theory vs. Real-World Scenarios: The Complexity of Attribution

Businesses that translate spreadsheets of data into day-to-day marketing decisions consistently win online.
Why?
You can only improve what you can track and correct what you can measure.
That means every customer interaction is a potential data point. But the modern reality of attributing a click to a specific channel is complex.
Marketers often call this concept “dark social.”
And no, it doesn’t refer to the back alleys of the internet—it refers to the traffic that gets missed when reviewing analytics.
If you see a blog with a review of a product, snap a photo, and send it to a friend—who will know about it? An analytics platform can’t track private messages and brand mentions as word-of-mouth sales.
It’s a significant problem for attribution—which content led to the sale or signup? If you rely solely on last-click attribution (assigning 100% of conversion credit to the last touchpoint before a customer took action), then you’ll miss hundreds or even thousands of results.
Thankfully, the solution is simpler than you might think—look at your data from an aggregate, blended perspective.
The Blended View of Data Analytics
Let’s break down what blended data actually means.
Sometimes analytics are like a microscope—they focus on highly specific details when you need to step back and look at the big picture.
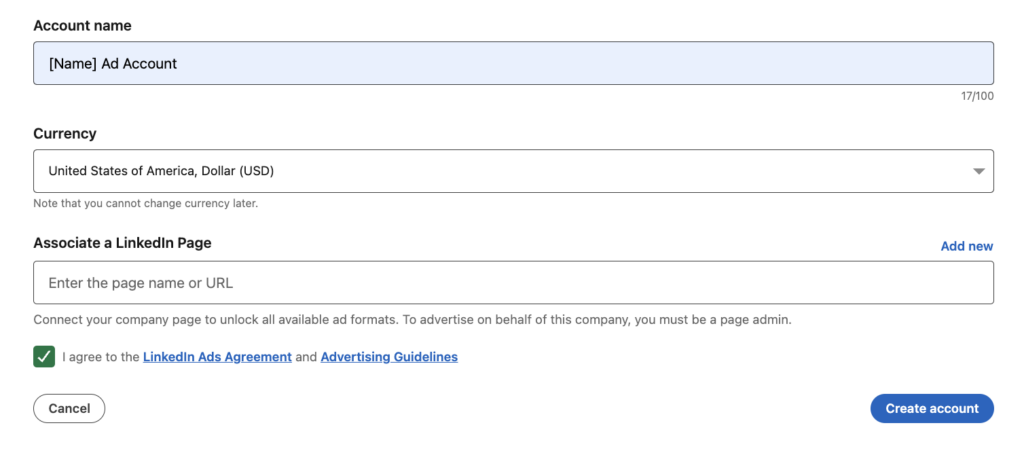
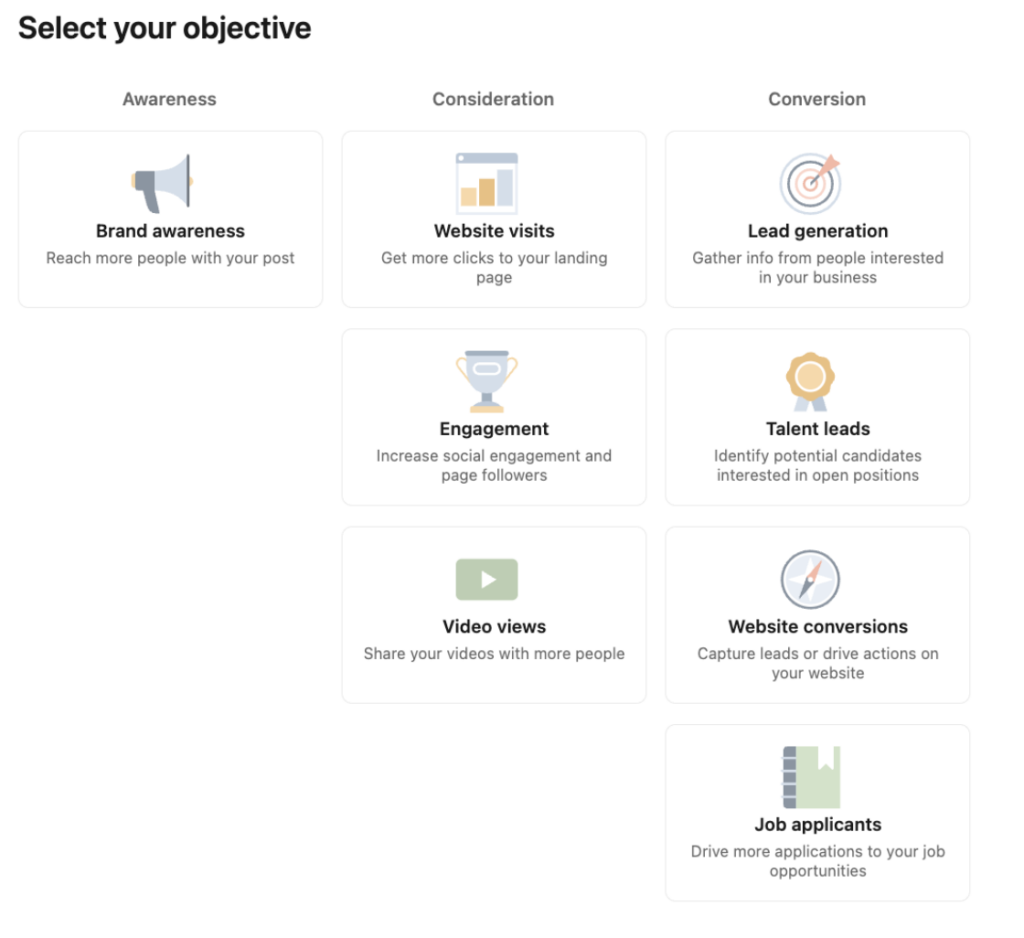
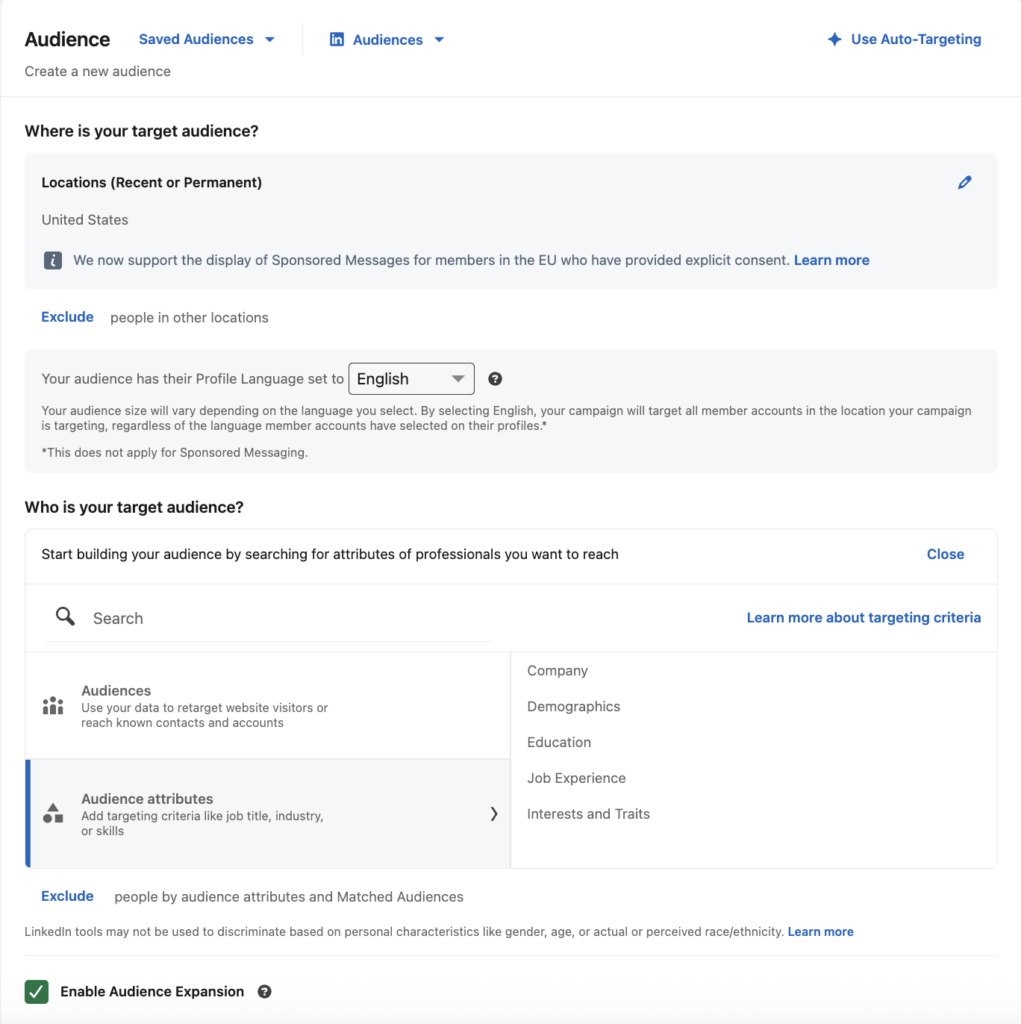
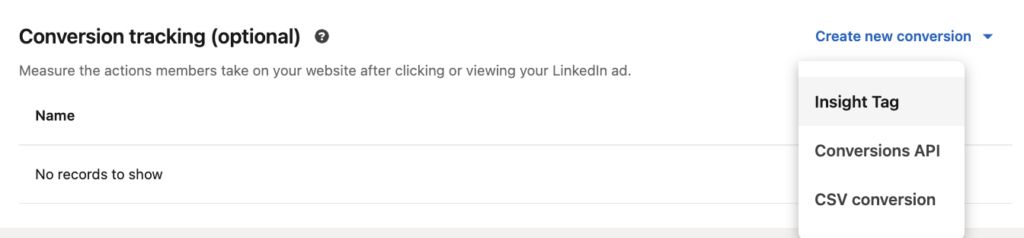
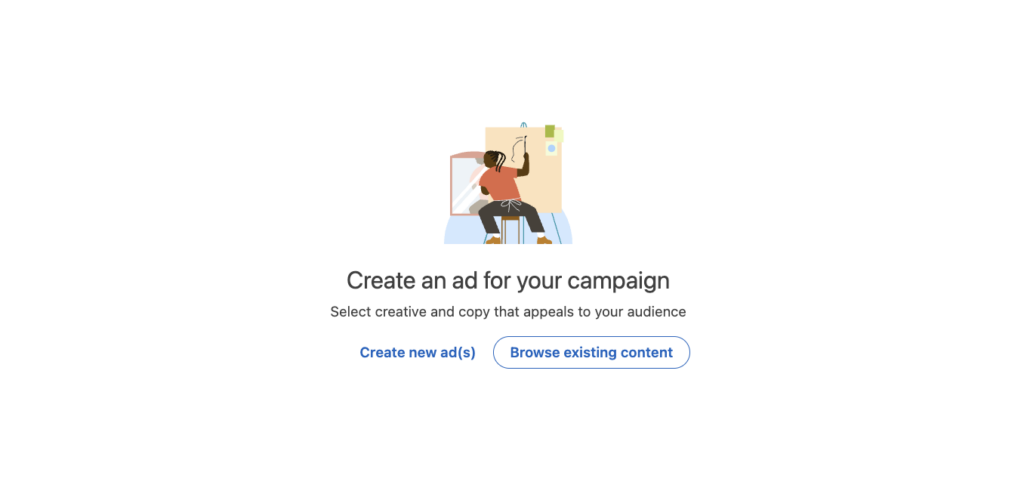
For example, imagine you run a sponsored content campaign on LinkedIn to promote a new industry report on your website. Google Analytics might state that content didn’t generate conversions, leading you to cancel the campaign.
But when you step back and look at your blended data, Google Analytics may also report that direct landing page views increased the day you started the content campaign and then dropped sharply when it was paused.
The answer to this mystery is aggregate data. It’s an invisible path—people saw the content, didn’t click immediately, but searched for your brand later to follow up.
The solution? Always look at the complete picture of your marketing performance.
The Research Says: 63% of consumers prefer sharing content with messaging instead of public forums. Consistent direct traffic to specific blog URLs is often a strong indicator of high-intent private sharing.
The Tech Stack: Marketer Essentials
Every person who works in marketing or who has a brand that wants to market needs a toolkit.
These platforms can revolutionize your approach to content marketing analytics as you learn what works for you and build a pipeline.

My top picks for tools include:
- Google Analytics 4: A next-generation website performance platform tool used to track user behavior, event conversions, and traffic sources.
- Google Search Console: An iconic search monitoring tool ideal for analyzing keyword rankings, organic click-through rates, and SEO health.
- Semrush: A comprehensive SEO and visibility platform used to monitor competitor rankings, research high-value keywords, and identify gaps in your content.
- HubSpot: A well-known customer relationship management (CRM) and marketing suite used to attribute specific content interactions to lead generation and individual customer journeys.
- Hootsuite: A convenient all-in-one social management platform that aggregates engagement metrics and compares content performance across multiple platforms.
- Microsoft Clarity: A powerful data visualization tool that allows you to “see” how users interact with your website through intuitive, color-coded maps of their clicks and scrolls. While traditional tools give general insight that a user scrolled, a heat map shows you why they stayed and where they “rage clicked” in frustration, revealing opportunities for improvement.
Want help building a content strategy that takes advantage of your analytics data? We’ll make sure you reach the right audience with the content they need.

Fundamental Metrics for Content
In the modern marketing world, you’ll often find people talking a lot about clicks and site traffic. But it’s vital to remember that no one metric should be taken alone—you need a complete picture.
For example, imagine if you made a blog post leading people to a landing page for an event that states they should come back in a week for updates.
Then, 10,000 people click on the link. That’s a success story, right? Not quite. If the large majority of those readers don’t return in a week to receive the update, then they were simply casual window shoppers who didn’t actually find significant value in your content.
That’s why we’re going to explain several of the core metrics you need for a complete picture.
Reach & Engagement: Measuring True Audience Depth
Reach and engagement metrics reveal the “stickiness” behind your content—once a user sees your brand, are they staying with the content and possibly returning in the future?
The main metrics to answer this question include:
- Qualified landing page traffic: Raw traffic refers to the people who simply pass by your content, while qualified entry describes visitors who actually view it, scroll through, and click another link.
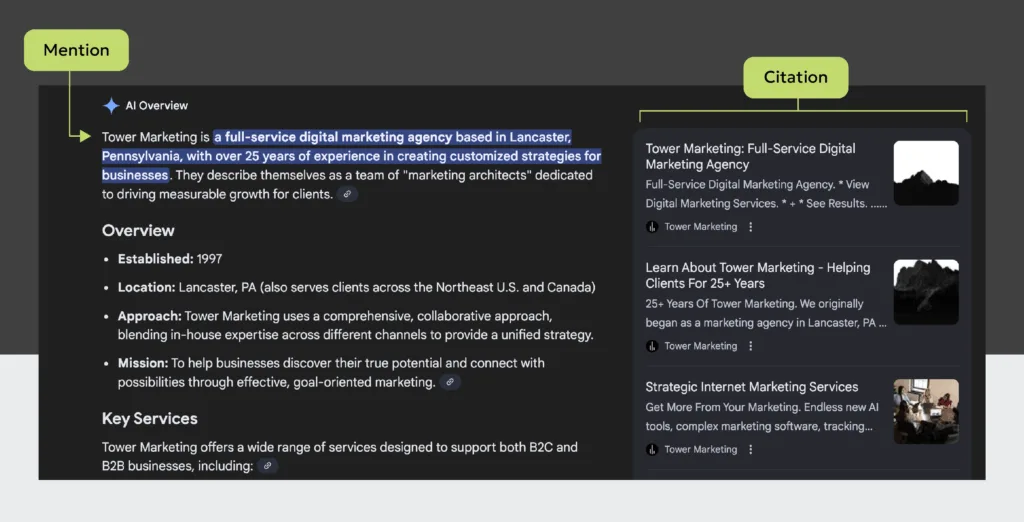
- AI search referral visits: The days of using a Google search for every question are coming to an end. That’s why you need to track how often AI cites your content, and, most importantly, the customers who actually visit your site as a result of a referral.
- Average engagement time per active user: This metric measures the actual time spent engaging with your site. Unlike many engagement metrics, it excludes time where a user has a tab open in the background but isn’t actually looking at or interacting with your content.
- Return reader rates: These are the visitors who stop by your website and then return. It’s a strong signal that your content is truly valuable for turning transactional clicks into long-term audience members.
- Views per session: This metric captures the average number of screens or web pages that users view within a session, even if a user visits the same page multiple times. Rather than telling you if someone engaged with your content or how long they viewed it, views per session gives you a picture of how actively they explored your site.
- Soft conversion actions: These are high-intent behaviors that don’t always result in a final lead or sale but signal that a customer is in the consideration phase of the funnel. You can track actions like email signups, PDF downloads, or clicking to view a physical address to figure out the value of your content before a user is ready to buy.
The Diamond in the Rough: Hidden Benefits of Content in Analytics
Often, content doesn’t immediately lead to a conversion—yet it’s vital to the customer journey.
For example, imagine you update the content on a landing page tied to an ad and see a sudden upswing in conversions, even though traffic volume remains flat.
What does that mean? Since the audience size didn’t change, the content itself is clearly more persuasive. Yet, traditional analytics tools would attribute the conversions to the ad.
These types of scenarios often hide the return on investment (ROI) for your content. That’s why assisted conversions and Explore Paths within GA4 are invaluable tools.
Assisted conversions in GA4 give balanced credit to the content and the PPC ad, since the user visited both before a conversion action.
Explore Paths is another top GA4 tool that allows you to map a visitor’s path to conversion. For example, it will track that a user visited a blog, came back a day later to watch a video, and then actually made a purchase later that evening.
Not sure how to get started in tools like GA4? Get in-depth insights from our blog on measuring user engagement metrics in GA4.
From Engagement to Action: Proving Content ROI
Once you have the tools to see how content influences the journey, the next step is measuring its direct impact on the bottom line.
Engagement metrics tell if people like your content, but conversion metrics tell you if it’s actually growing your business consistently.
To truly measure the value of your content, there are two crucial indicators you should review: leads per keyword and sales velocity.
The leads per keyword metric goes beyond simply tracking which search terms bring visitors to your content—it identifies the exact keywords that actively trigger sign-ups, downloads, and revenue.
The sales velocity metric measures how fast a lead moves from the first click to a closed purchase or sign-up. The right high-quality educational content “pre-sells” prospects by answering their upfront questions and managing expectations before they ever meet with your team. The better your content, the shorter the sales cycle.
But the real power of analytics isn’t just proving what works. It’s the process of refining your work until you hit on the version that will drive the most conversions and eliminate poor-performing content.
When you spot a slowdown or red flag in your data, it’s often time to pivot in your content strategy. For example, if a page has high traffic but readers bounce in under 15 seconds, the headline might be confusing or might not match the content.
Simply updating or refreshing existing content with new keywords and insights is often one of the highest return on investment (ROI) you can make.
In the end, analytics shouldn’t sit in a spreadsheet somewhere—they should be the cornerstone of your marketing strategy.
Still need more info about what metrics to track for email, SEO, pay-per-click (PPC), and social media? Check out our quick start blog for performance metrics.
Key Takeaways
- Because dark social makes last-click attribution unreliable, businesses must cross-reference blended data across channels to get a snapshot of the customer journey.
- It’s crucial to build a reliable tech stack with Google to accurately track user behavior across social media, advertising, and websites.
- You can measure the true “stickiness” and depth of your audience by reviewing:
- Qualified landing page traffic
- AI search referral visits
- Average engagement time per active user
- Return reader rates
- Views per session
- Soft conversion actions
- Businesses must prove the direct return on investment (ROI) of their content by monitoring foundational conversion indicators like leads per keyword and sales velocity.
Data is only as powerful as the strategy behind it. Our in-house content team will partner with you to translate your hard numbers into authentic content that’s crafted for real people and keeps your audience coming back.