 By Grace Z
 Don’t Miss A Step: Your Complete LinkedIn Ads Checklist
- Content Marketing
- Social Media Marketing
Join Our Newsletter List

If you’re looking to make an impact in social media marketing within the professional sphere — LinkedIn is where you want to be. Breaking into the world’s largest professional networking platform may seem daunting. That’s why we created this LinkedIn ads checklist to guide you through creating, setting up, and launching successful campaigns.
How to Set Up a LinkedIn Ads Account
Before we jump into our LinkedIn ads checklist, it’s important to review how to set up a LinkedIn ads account. To start, go to your LinkedIn homepage. At the top of the click For Businesses, and select Advertise.
If you already have a Business Manager account, click on your profile image or Business Manager logo in the upper right corner of the page.
Note: To create a new ad account, you must be a Business Manager admin. After creating a new ad account, it will automatically be added to the selected Business Manager.
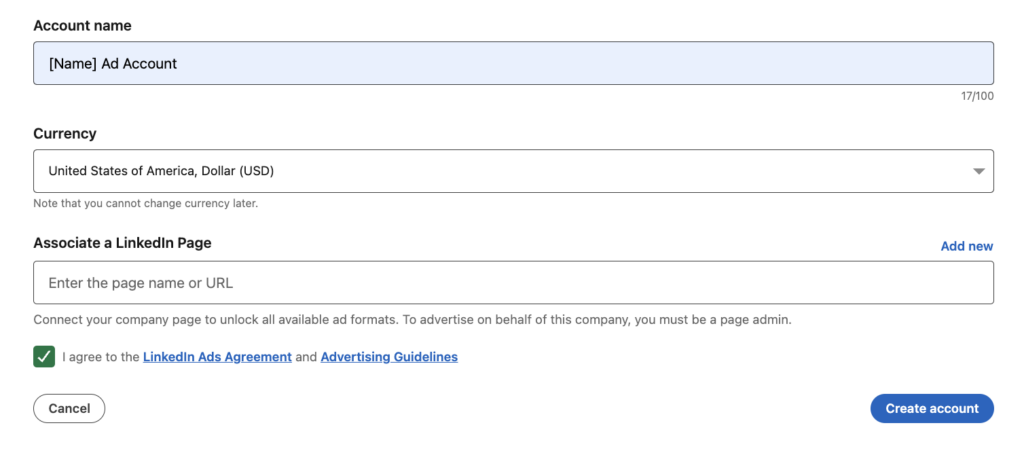
If you don’t want your new ad account to be owned by a Business Manager account, select your profile instead. Then, choose the name, company page, and currency for your new account.
After creating a new account, you’ll be granted account manager and billing admin access. As an account manager or billing admin, you can add partners to the ad account.
LinkedIn Ads Checklist
Now that you understand the basics of how to set up a LinkedIn ad account, you can move on to creating your ads. Our LinkedIn ads checklist is your guide to ensuring successful campaigns.

Can’t Wait?
Step 1: Select or Create a Campaign Group
The LinkedIn ad campaign set up begins with a campaign group, then a campaign, and lastly an ad. To begin, you’ll sign in to LinkedIn Campaign Manager and click on the respective account name.
This will take you to the campaign creation page. From here, you can select or create a campaign group for your individual campaign and ads. If it’s your first campaign, you will need to start by filling out the Campaign Group details.
When creating a new campaign group, LinkedIn gives you the option to choose a group objective (see step 3), budget, and schedule (see step 4). However, you can also choose to opt out of doing this if you’d like your individual campaigns to use different objectives, budgets, and run times.
If you already have a campaign group, click on the name of the Campaign Group you’d like this new ad campaign to live under.
Step 2: Select Your Campaign Objective
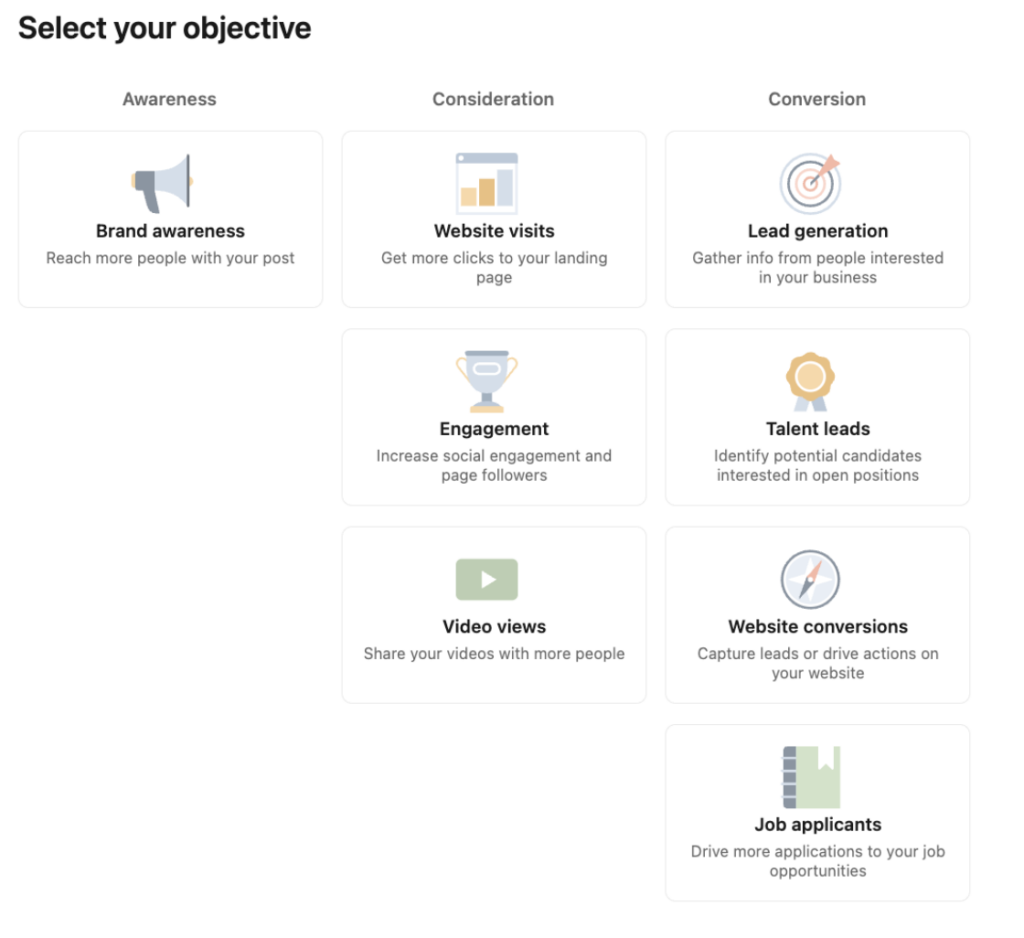
The next step in our LinkedIn ads checklist is choosing the correct campaign objective. This plays a key role in learning how to run successful LinkedIn ads. There are seven objectives you can choose from, all of which can be broken down into three main goals: awareness, consideration, and conversions. Below, we’ve outlined the details of each objective and its benefits.
Awareness campaigns maximize your brand visibility through impressions. This objective is ideal for top-of-the-funnel brand building:
- Brand awareness
Consideration campaigns encourage your customers to take action to find out more about your business. These objectives are good for getting clicks that send users to your website, interacting with your posts, taking social actions, or getting more company followers. The options for consideration campaigns are:
- Website visits
- Engagement
- Video views
Conversion campaigns focus on lead generation and tracking actions on your website, such as downloads, form submissions, phone call clicks, and more. These objectives are one of the most effective ways to capture leads and gather data that you consider valuable:
- Lead generation
- Website conversions
- Job applicants
Note: To run conversion campaigns, you must use conversion tracking (we’ll discuss this in further detail below).
Step 3: Select Your Group Budget & Schedule
There are multiple options for setting LinkedIn ads budgets and schedules. The first option, Dynamic Group Budget, allows you to set one central campaign group budget in Campaign Manager.
LinkedIn automatically shifts the spending within that group to the campaigns that are performing best and giving you the best results, depending on your goals (like clicks, leads, or conversions).
However, like we mentioned above, you can also choose to select a LinkedIn ads budget and schedule at the campaign level. We will cover this further down (see step 7).
Step 4: Build Your Target Audience
There are numerous LinkedIn ads targeting options, from professional traits to personal interests. When building your target audience, it’s important to keep a few things in mind, such as your advertising goals, location, budget, and more.
- Location: continent, country cluster, country, state, region/market area, county, and city.
- Company: company connections, company followers, company industry, company name, and company size.
- Demographics: age and gender.
- Education: degrees, fields of study, and member schools.
- Job Experience: job function, job seniority, job title, member skills, and years of experience.
- Interests: groups and member interests.
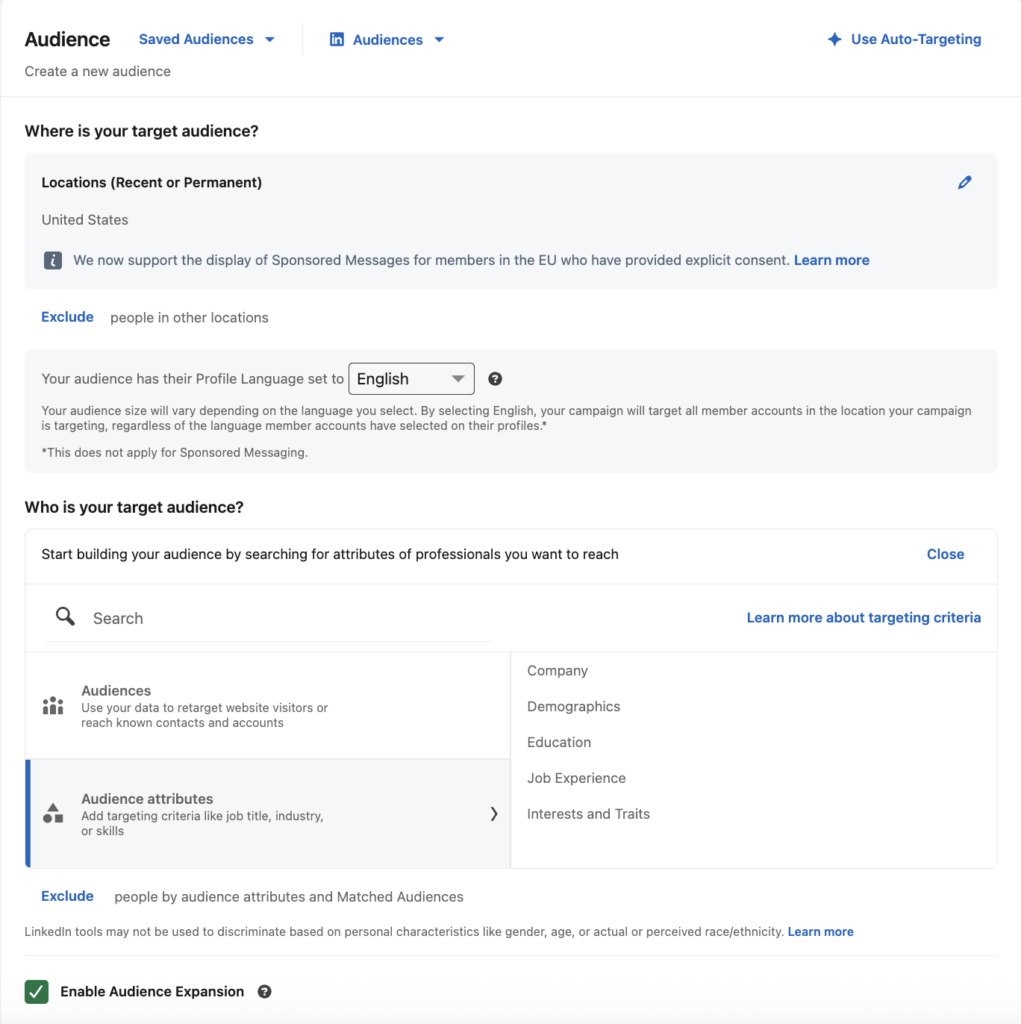
Besides the traditional LinkedIn ads targeting options, LinkedIn allows advertisers to expand their audience by enabling Audience Expansion or building a Lookalike Audience.
These permit LinkedIn’s algorithms to identify additional audience members that are similar to your initial target audience. Using either option can help advertisers reach a broader audience that’s still relevant and generate more data.
Advertisers can also customize LinkedIn ads targeting with business data they’ve collected themselves. These are known as Matched Audiences and can be used for retargeting, contact targeting, or company targeting.
It’s important to note that your audience size will play a key role in how your campaigns perform. Best practices recommend keeping your target audience over 50,000 for Sponsored Content and Text Ads, and over 15,000 for Message Ads.
Step 5: Select Your Ad Format
The next step in our LinkedIn ads checklist is to select your ad format and placements. LinkedIn offers various formats, including:
- Sponsored Content: Carousel, Document, Thought Leader, Event, Article & Newsletter, Single Image, and Video Ads.
- Message Ads: Ads that are shown in LinkedIn messaging.
- Text Ads: Right rail and top banner ads.
- Dynamic Ads: Follower, Spotlight, and Content Ads.

Step 6: Select Your Budget & Schedule
If you did not set a budget at the campaign group level, you will do so now. There are two types of LinkedIn ad budgets to choose from for your campaigns:
- Daily budget: how much you can spend per day for that particular campaign.
- Lifetime budget: the total amount you want to spend throughout the campaign.
After choosing which LinkedIn ad budget option best suits your advertising efforts, you’ll be prompted to select the duration your campaign will run. You can choose to run your campaign continuously with a start date or on a fixed schedule with a start and end date.
Next, you’ll notice there are bidding options available. LinkedIn ad bidding is how you compete with other advertisers on LinkedIn. There are two bidding options available when setting your campaign budget:
- Maximum delivery bidding: allows LinkedIn to set a bid that gets the most results while delivering the full budget.
- Manual bidding: allows advertisers to set their preferred bid for the auction.
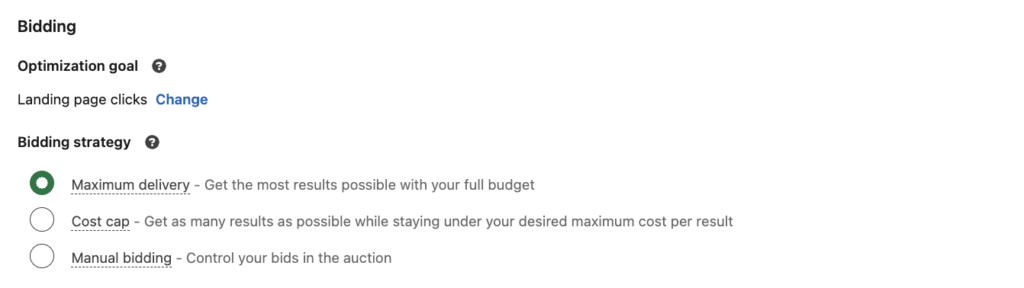
We recommend starting out with maximum delivery bidding if you’re new to running ads. Since you’re just starting out, you may not have as much of an idea on what bids are competitive against others vying for your audience. And maximum delivery bidding will allow you to establish what the average cost per result is for your business.
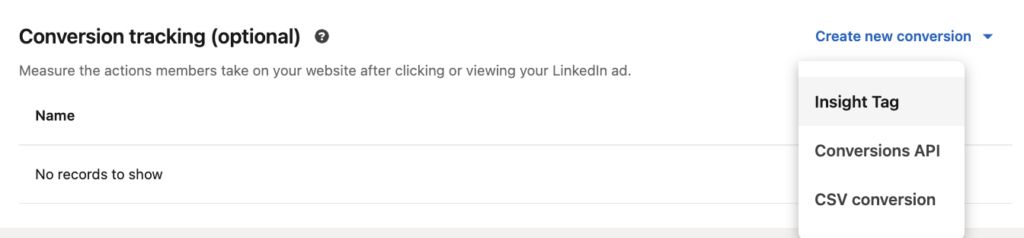
Step 7: Set Up Conversion Tracking
While it’s not mandatory for all campaigns, setting up LinkedIn ads tracking is highly recommended and can be done by adding the LinkedIn Insight Tag to your website. Once it’s set up, you’ll be able to participate in the following actions:
- Conversion tracking: track when a LinkedIn member account visits a page or takes an action on your website after viewing or clicking your ads.
- Website audiences: create and build custom audiences to retarget LinkedIn member accounts that visit your site.
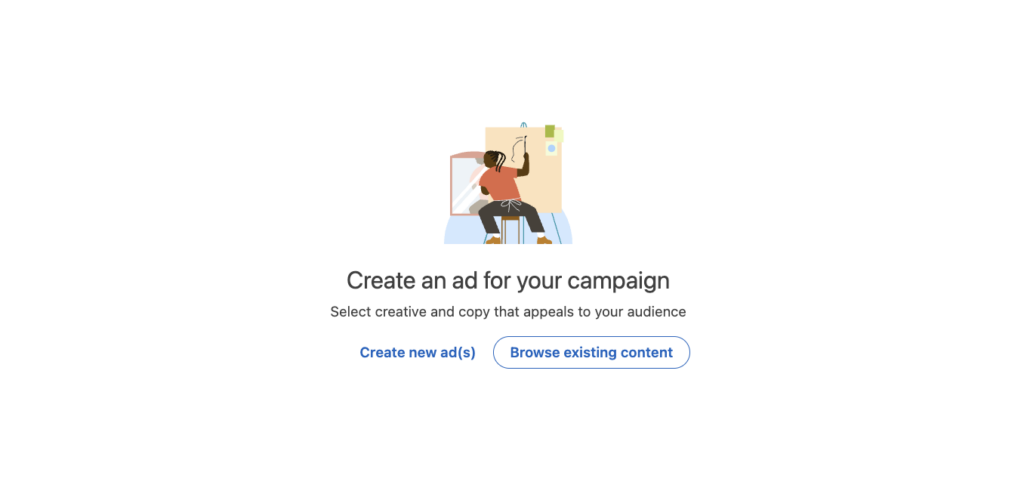
Step 8: Set Up Your Ad(s)
Now that you’ve completed your LinkedIn ad campaign setup, it’s time for you to focus on creating your ads. Ad requirements will vary depending on the format you’ve chosen in step 6. Generally speaking, some best practices for LinkedIn ads include:
- Featuring engaging ad creative and visual content (imagery, videos, graphics, etc.).
- Using strong call to actions (“Sign Up”, “Download”, “Shop Now”, etc.).
- Addressing your audience directly in headlines and copy.
- Creating multiple ad variations (4-5) per campaign.
- Optimizing ads and destination URLs on all devices (desktop, mobile, tablet, etc.).
- Trying A/B testing to see how different criteria perform.
Step 9: Review & Launch
Finally, we’ve reached the last step in our LinkedIn ads checklist — you’re ready to review and launch your campaign. This is where LinkedIn will ask you to add or confirm the payment method, as well as look over the details of your campaign. After clicking Launch, your campaign will enter a review process before it’s pushed live.
Note: To estimate the impact of your campaign before launching, use the Forecasted Results guide.
After your campaign is live, don’t forget to monitor its performance. Once the campaign has accumulated enough data, you can see detailed information about the professionals who clicked and converted on your ads under the Demographics tab. You can then use these insights to improve your ad content, creative, targeting, and testing.

Whether your goal is brand awareness, website traffic, or more reviews, we create social ads that cut through the noise. Let’s work together to strengthen your social media marketing strategy.
Ready to see what LinkedIn ads can do? Our specialists are here to build social campaigns that tick every box on your customized LinkedIn ads plan.
 Danae
Danae Best Email Marketing Platforms: A Comprehensive Comparison
- Email Marketing & Automation